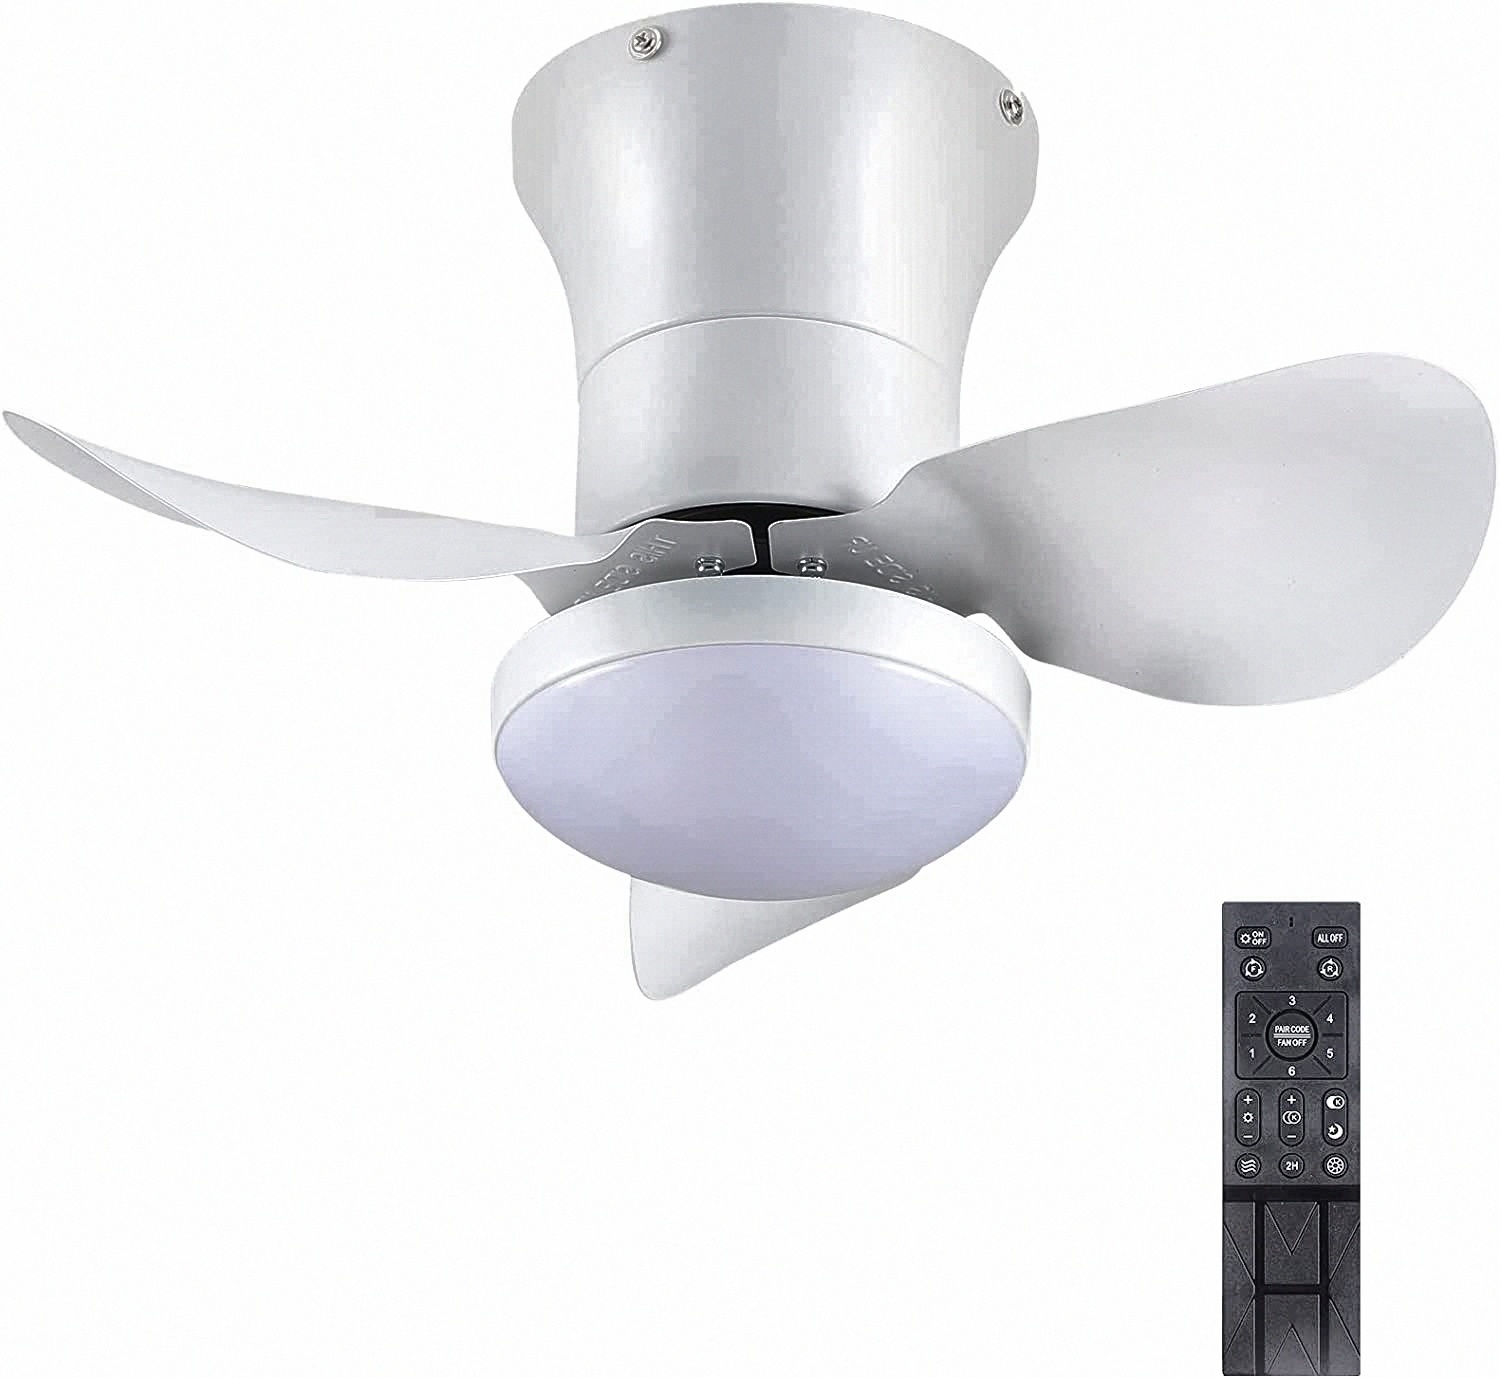


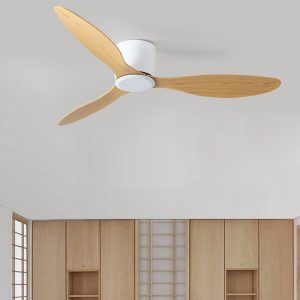
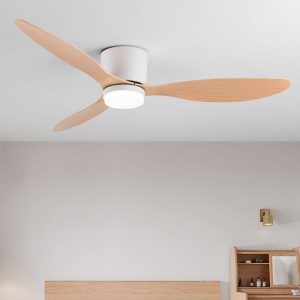
39 39 Flush Mount Ceiling Fans Low Profile Ceiling Fan Light Memory Function Dimmable Mini
$127.98
Free shipping on orders over $50!
- Satisfaction Guaranteed
- No Hassle Refunds
- Secure Payments
Description
39 39 Flush Mount Ceiling Fans Low Profile Ceiling Fan Light Memory Function Dimmable Mini
This fits your .
Make sure this fits by entering your model number.
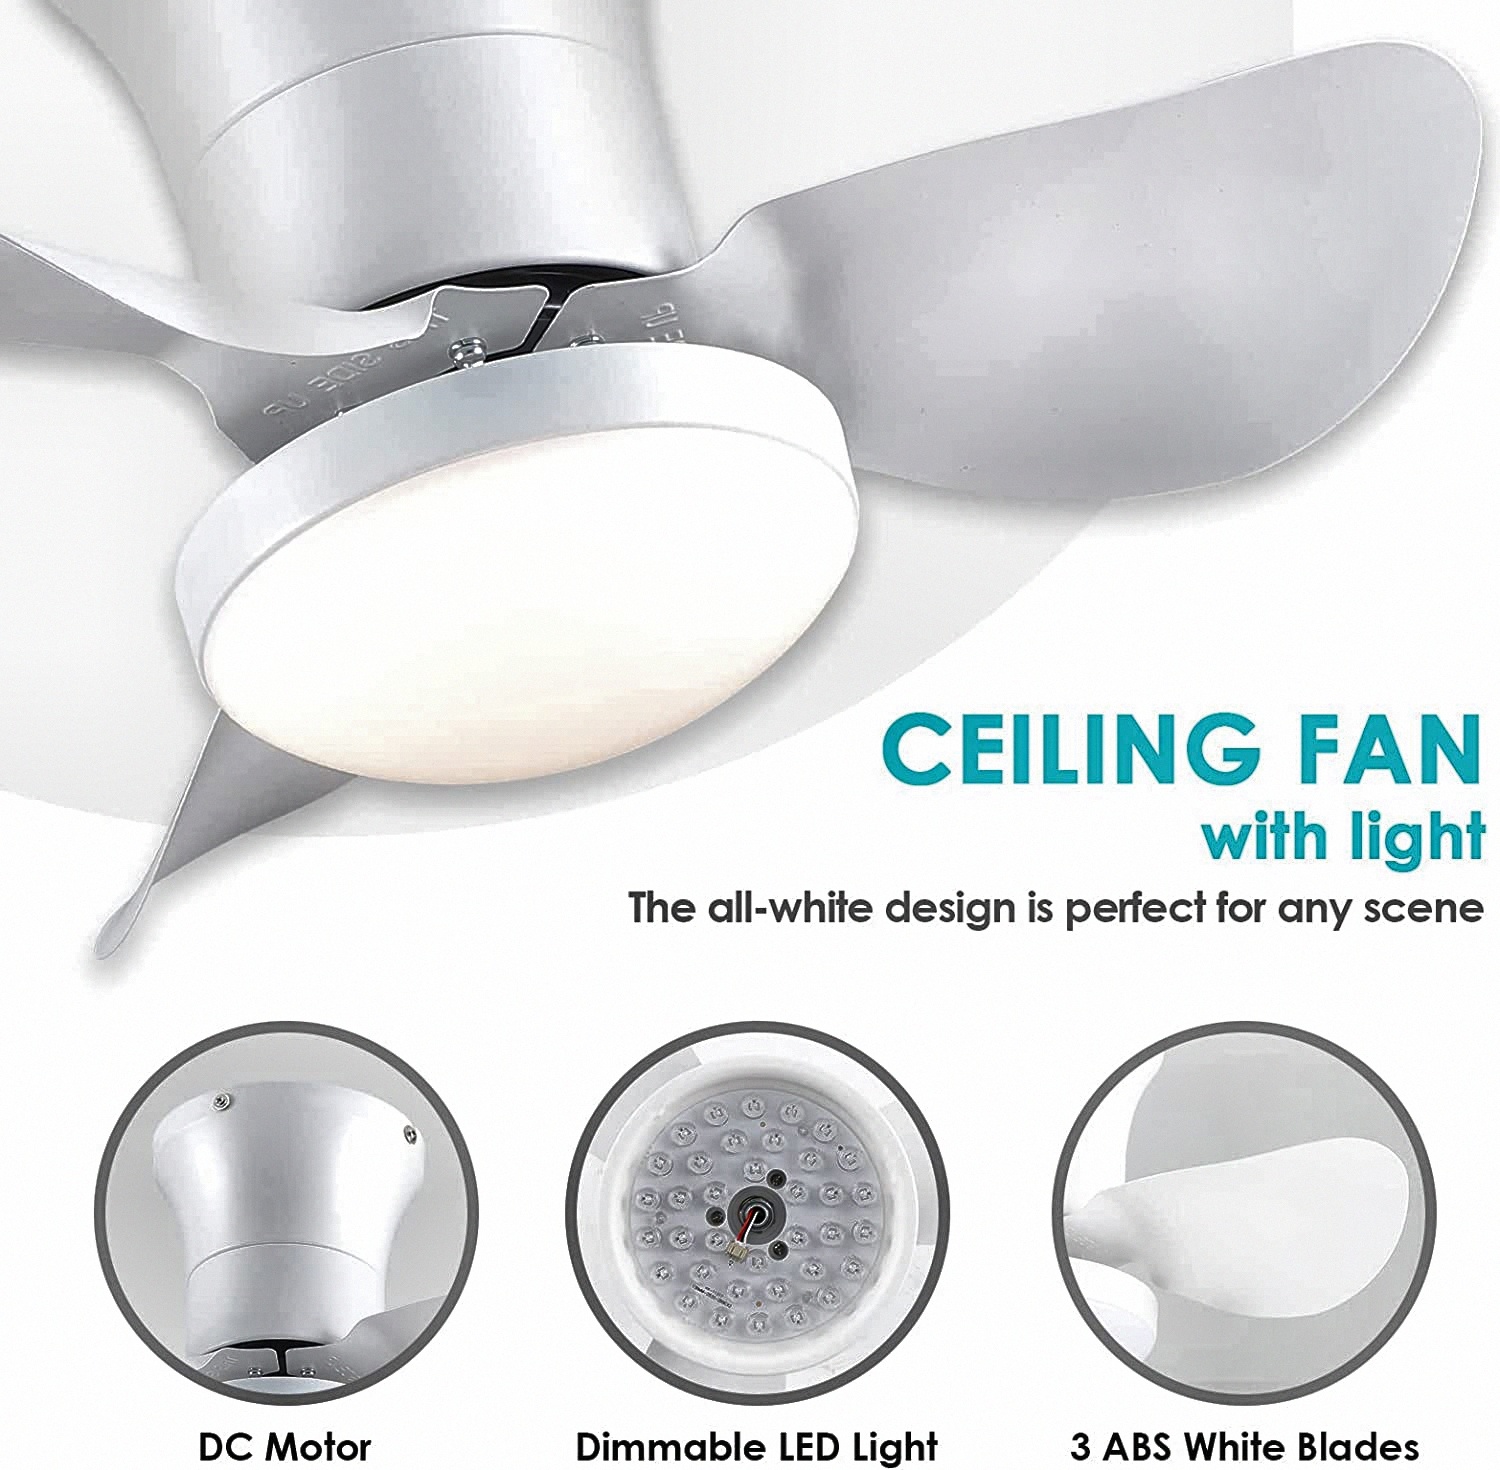
【Small Size and Large Air Volume】The diameter of this small ceiling fan is only 21 inches, which is very space-saving, but the propeller design of the fan blade makes it easy to move a lot of air, while the propeller shape and large-angle 240° metal fan blades are easy to move a lot of air and increase the effective range.
【Reversible Motor】Pure copper DC motors,The reversible control function can switch the wind direction of the ceiling fan from the downward air flow in summer to the upward air flow in winter, so as to recover the heat lost from the ceiling and distribute the heat evenly throughout the room.
21” mini size is perfect for small room such as kitchen bedroom dining room study room porch.
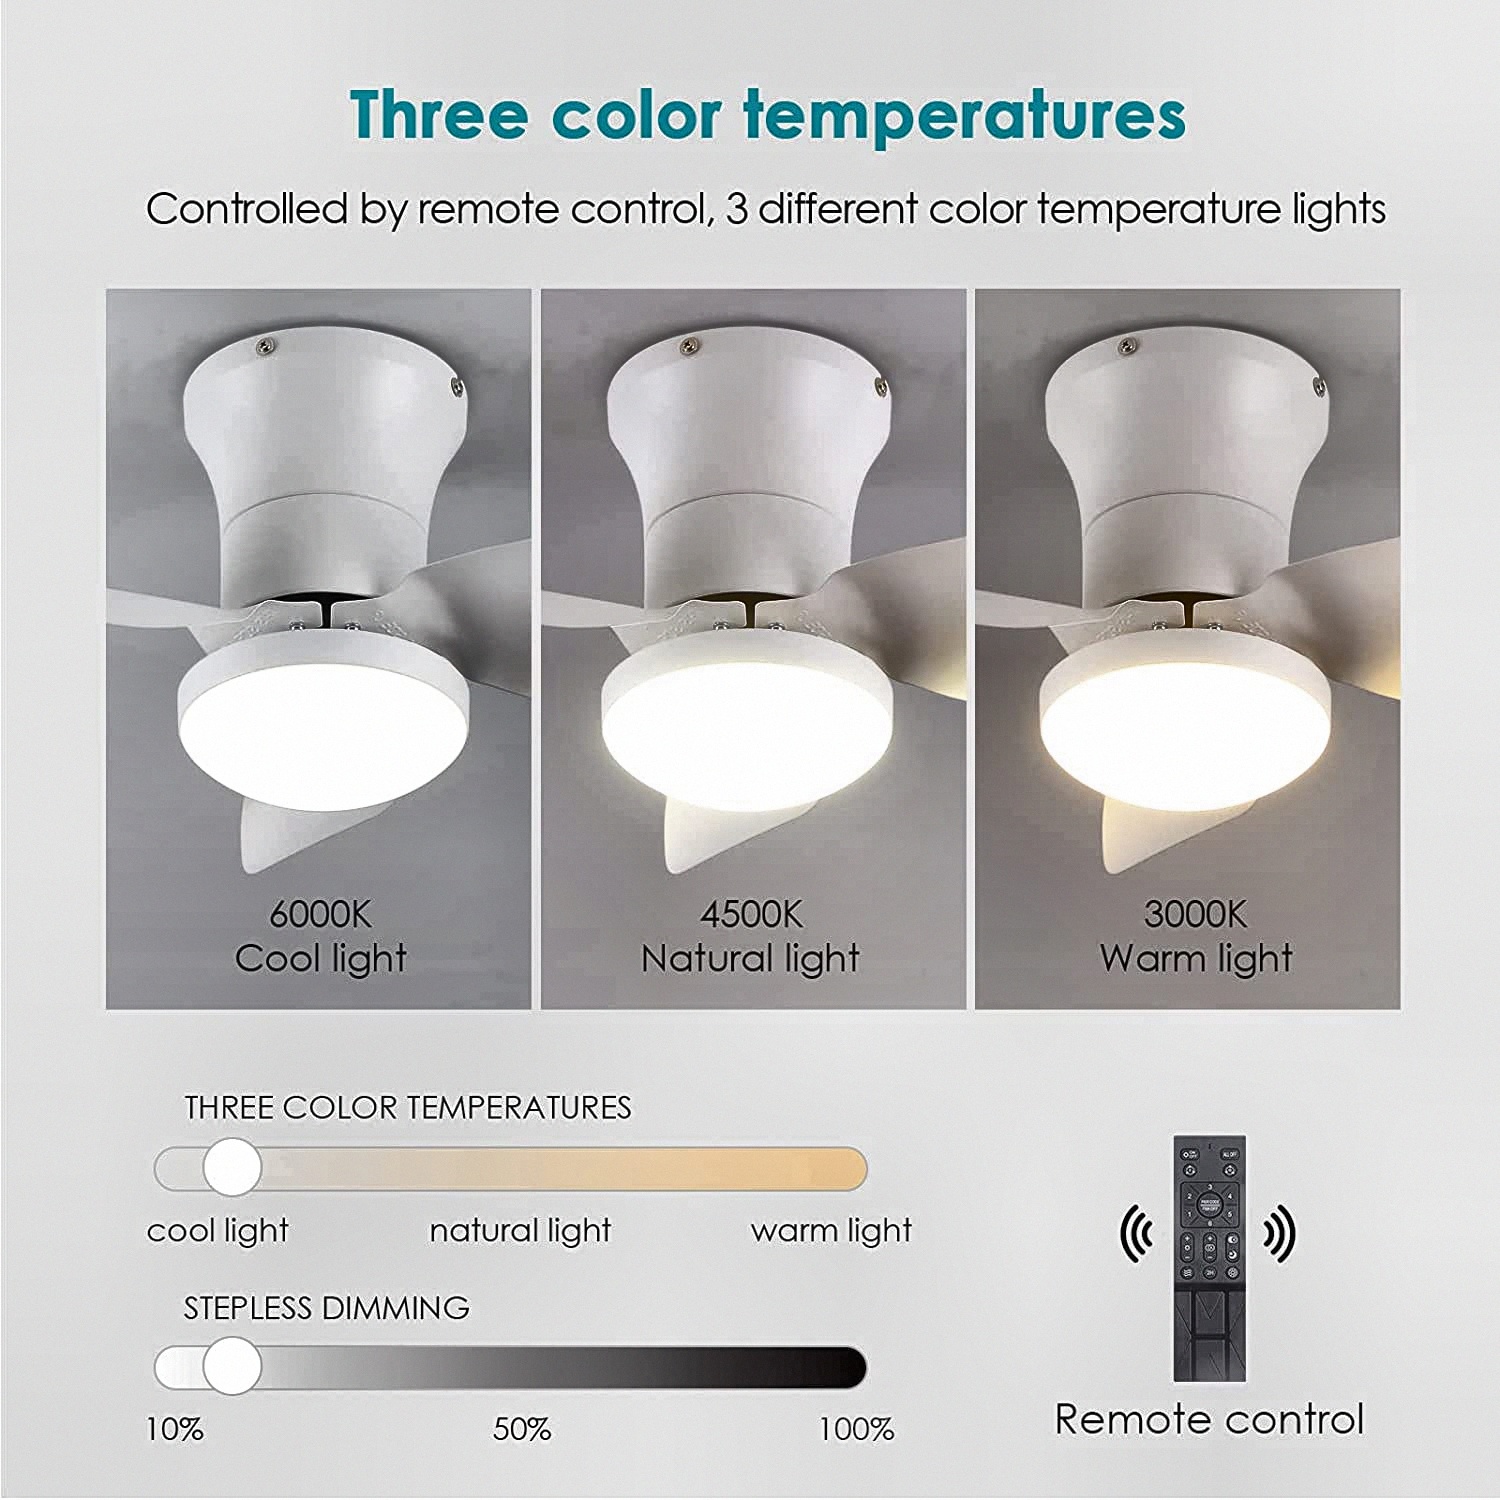
【Remote Control】 This mini ceiling fan with With infinitely dimmable light,can be controlled by both remote control, and the fanlight has a memory function, which will retain the brightness of the last use when the lamp is turned on 【Multifunctional Quiet Fan】This Quiet ceiling fan with 6 wind speed settings 2h timer setting and function of night light mode, Quiet work will not affect sleep or learning 【Warranty Assuring of Small Ceiling Fan】Mpayel provides a 1-year warranty for quality-related replacement or refund.
Feel free to reach out to our service team if you have any question about this samll led ceiling fan, we will be back to you within 24 hours.
Related products
-
Sale!

modern wood ceiling fan with light
$219.82 – $246.06Select options This product has multiple variants. The options may be chosen on the product page -
Sale!
retractable invisible ceiling fan
Original price was: $308.33.$255.91Current price is: $255.91.Select options This product has multiple variants. The options may be chosen on the product page -
Sale!
ceiling fan minimalist modern
$180.67 – $191.65Select options This product has multiple variants. The options may be chosen on the product page -
Sale!
wooden ceiling fans with lights
$212.51 – $239.33Select options This product has multiple variants. The options may be chosen on the product page

Bill L –
The 8800M is a nicely built product with quality components and when assembled should provide good service for a small room as it is designed. Assembly instructions are complete with diagrams and descriptive text however terminology may be confusing. Note my PHOTOS and comments are provided to make your installation clearer. Instructions page 4 refers to “boby fire wire” which I read as “body positive wire” which is normally black or red and “zero wire” which i read as “negative wire” which is normally white. These are the only two wires needed to connect to a US standard 110-120v electrical box. Both wires are stripped and tinned although I’d suggest removing another 1/4″ of insulation on each wire. There is another white wire with an end cap which is the remote-control antenna and should not connect to anything but left as is.I chose to assemble and install blades of the fan on a bench however the instructions show assembly on the ceiling. Your choice, however, I found it easier to assemble then hang the completed fan assembly on the installed hanging plate for final electrical hookup. In installation manual on page 4 figure 4, removal of lighting strip, note location of “round hole screw” (others are slotted and should only be loosened to remove circular light element) My tools used to remove electrical socket and lights are shown in attached PHOTO but not included. If you choose to build the assembly on a bench note instructions page 5 figure 7, the words “”This Side Up” on the fan blades will be reversed since you’re building the fan assembly upside down on a bench and not on ceiling.After mounting the base plate to the ceiling, a provided hook and the included ‘S’ hook (PHOTO)included connection allows the fan assembly (fully or partially assembled) to be hung for final wiring to electrical box. Disconnect home electrical power before any installation. Connect wires to the ceiling box using the included ‘wire nuts’ attaching the fan “blue” wire to your home’s-colored wire (usually black or red) and the fan’s “white” wire to your home’s white wire. The wiring schematic on page 6 is excellent for diagnostic purposes but does not provide any useful information for wiring connection. Remove the temporary S hook, hang fan on the 2 open slotted screw holes and install 2 round hole screws from fan to hanging plate then tighten all 4. This completes the installation followed by using the remote control to pair to the fan. Turn on house power and turn on the wall switch controlling fan. Within 5 seconds press the “Pair Code” button and the fan light will blink twice indicating fan is ready to be controlled by remote. There is functionality only through the full function remote after installation. Fan speed, direction, light intensity, kelvin light color and more is changeable from the remote-control unit. There is a QR code linked to download on all mobile platforms, but I was unable to activate it from the App Store. I’m very happy with this fan and with a clearer installation manual and functionality without having to use provided handheld remote it is a 5-star item.


Integrity Reviews –
This is a potent little ceiling fan that moves a surprising amount of air.I have a ceiling fan on my patio that has been dying for several years and barely works anymore. It’s a typical 54″ fan but between the weather, bird poop, and just age, it was due for replacement. This small ceiling fan is designed for patio use while my old one was intended for indoor.I mention this because I already had the mounting box and wiring for power in place. I just had to take down my old fan, remove the old mounting plate, install the new mounting plate, wire up the fan, and attach the fan to the mounting plate. So the actual installation was easier for me.If you have a wall switch that you were using to control the old fan and light, they aren’t useful here. This new fan can be controlled only with the remote or the App.Big BUT here: the installation instructions make the job much more difficult than it has to be.The instructions tell you to mount the fan housing to the mounting plate on the ceiling, and then to attach the fan blades working upside-down. For typical 54″ fan this makes sense. But this is a small fan that does not weigh very much, so instead just turn-over the fan so the base (ceiling part) is on your workbench with the light pointing up.– The plastic light lens can be removed by turning just the lens part a quarter-turn counter clockwise and lifting it up. That will expose the LEDs shown in the first picture.– The small wire connector in the center has to be disconnected. I had to use a pair of pliers but your’s might come out easier. Then the three screws around the center hole have to be loosened (follow the instructions to remove just one screw and remove the LED plate).– Install the fan blades and be sure to install them in the proper direction. You see the fan blade at the 7-8 o’clock position reads “This side up”? I installed it backwards (by mistake, honestly!) because this is the DOWN side of the fan! The other two fan blades show “This side up” backwards because this is stamped into the metal so shows through on the backside. So I removed it and reinstalled it correctly.– Reinstalled the LED light plate, re-connected the wire connector, and put back on the light cover.– There is a big “S” hook in the hardware kit and I put one end through a mounting hole on the fan body, and the other end hooked over a hook that is part of the ceiling mounting plate. Then I wired it up following the instructions. (I had an extra wire, the red one here, that was used to control the light from the wall switch. It’s not used for this installation so I just put the original wire nut over it to protect it.) The white rectangular thing sticking out from the fan base is part of the digital control unit for the fan.– After wiring it up, unhook the “S” hook, and attach the fan to the mounting plate following the instructions.If you have a wall switch you were using to control an old fan, the only thing it will do here is turn on and off the light. All other controls including fan speed, direction, light brightness and color, have to be controlled either with the remote or the App. The App is not required but it is what makes this a “smart” ceiling fan if you want to control it through Alexa.If you don’t want to use the app, just follow the instructions to pair the remote and you’re good to go!


